How To Season Cast Iron The Right Way
At a Glance Seasoning cast iron the right way creates a durable non-stick surface that protects the pan from rust and damage while improving cooking performance and heat retention. The process involve…
Seasoning cast iron the right way creates a durable non-stick surface that protects the pan from rust and damage while improving cooking performance and heat retention. The process involves applying a very thin layer of oil and then heating the pan at a high temperature to effectively polymerize the oil into a hard, smooth coating. This polymerized coating becomes increasingly non-stick with regular use and simple maintenance, and it ensures the pan remains a reliable cooking tool for a lifetime.
Getting your cast iron cookware ready for action is simpler than you think. When you learn How to Season Cast Iron the Right Way, you create a natural, non-stick surface that makes cooking a joy. This process not only protects your pan from rust but also makes it a fantastic cooking companion for years to come.
You’ll find your food slides right off, and your pans become easier to clean, improving your overall cooking experience significantly. Stick around, and we’ll walk you through each step to get your cast iron perfectly seasoned and ready for your favorite meals.
Key Takeaways
- Properly seasoning cast iron creates a natural, non-stick cooking surface.
- Seasoning protects your cast iron from rust and damage.
- The process involves applying a thin layer of oil and heating the pan.
- Regular use and maintenance further improve the seasoning over time.
- Knowing How to Season Cast Iron the Right Way ensures your pans last a lifetime.

Why Seasoning Cast Iron Matters
Cast iron cookware is a kitchen staple for a reason. It heats evenly and holds that heat, making it perfect for searing, frying, and baking. However, bare cast iron is prone to rust and can stick terribly if not treated correctly.
This is where seasoning comes in. Seasoning is essentially baking a layer of oil onto the metal. This creates a smooth, slick surface that gets better with every use.
Learning How to Season Cast Iron the Right Way is the first step to unlocking its full potential.
A well-seasoned pan is a pleasure to cook with. Food releases easily, preventing frustrating sticking and making cleanup a breeze. It also adds a little extra flavor to your meals.
Without proper seasoning, you’ll find yourself scrubbing endlessly and dealing with food that just won’t budge. So, investing a little time in learning How to Season Cast Iron the Right Way pays off big time in the kitchen.

Getting Your Cast Iron Ready for Seasoning
Before you start the seasoning process, it’s important to prepare your pan. If your cast iron is brand new, it likely has a protective coating from the factory. You’ll need to wash this off.
Use warm water and a little dish soap. Scrub it well with a stiff brush or sponge. Rinse it thoroughly and dry it immediately and completely.
If your cast iron is old and rusty, you might need a bit more work. A common method is to use steel wool to scrub away all the rust. For very stubborn rust, some people soak the pan in a vinegar and water solution for a few hours.
After scrubbing, wash it with soap and water as you would a new pan. Always dry it completely right away to prevent new rust from forming. This preparation is key to understanding How to Season Cast Iron the Right Way.

The Simple Steps to Season Cast Iron
You don’t need fancy equipment to season cast iron. The process is straightforward and can be done in your oven. It involves applying oil and heating the pan to a high temperature.
This bakes the oil into the metal, creating that protective layer.
Step 1: Apply the Oil
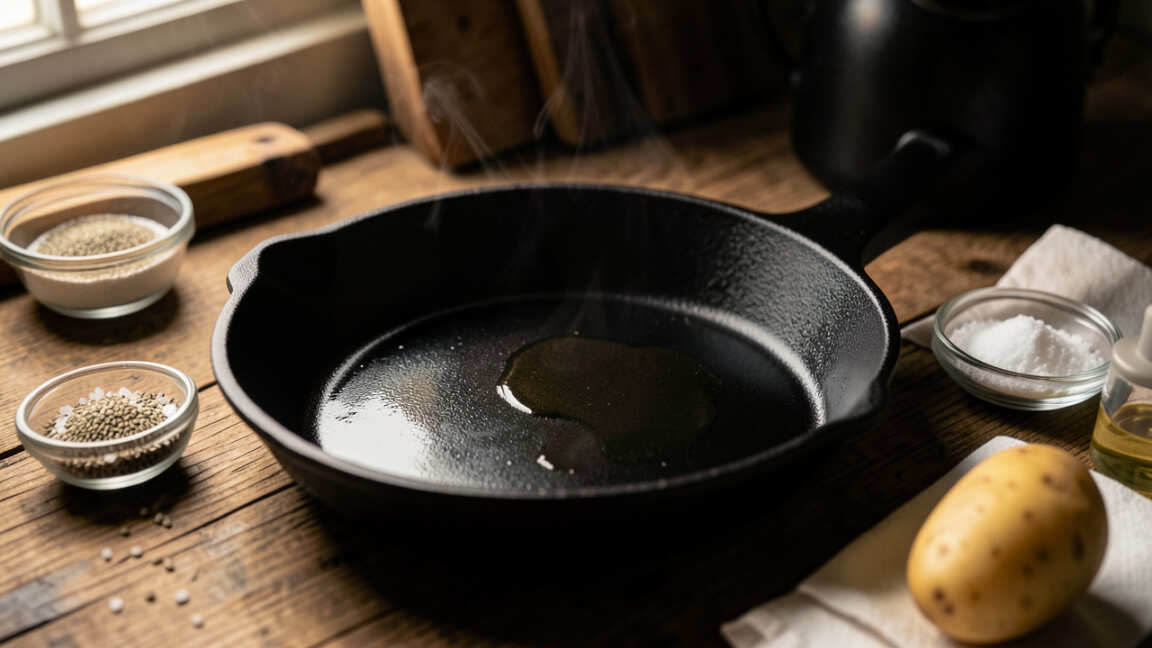
First, after drying your cast iron completely, apply a very thin layer of cooking oil all over the pan. Use an oil with a high smoke point. Good options include vegetable oil, canola oil, flaxseed oil, or grapeseed oil.
Some people prefer Crisco. Avoid olive oil as it can go rancid and doesn’t create as durable a layer.
Use a paper towel to spread the oil. Then, use a clean paper towel to wipe off as much oil as you can, as if you made a mistake and are trying to remove it. You want a microscopic layer of oil, not a visible greasy coating.
Too much oil will result in a sticky, uneven finish.
Step 2: Heat the Pan
Next, preheat your oven to a high temperature. Aim for around 450-500°F (230-260°C). The exact temperature depends on the oil you use and your oven.
You want the oven hot enough to smoke out the oil.
Place your cast iron pan upside down on the middle rack of the preheated oven. Put a baking sheet or aluminum foil on the rack below to catch any drips. This prevents a mess in your oven and helps you achieve a smooth finish.
This is a critical part of learning How to Season Cast Iron the Right Way.
Step 3: Bake and Cool
Then, let the pan bake for at least one hour. You might notice a little smoke, which is normal. The heat bakes the oil into the cast iron, polymerizing it into a hard, protective layer.
After an hour, turn off the oven. Leave the pan inside the oven to cool down completely. This slow cooling helps the seasoning layer set properly.
Step 4: Repeat if Necessary
Finally, for the best results, repeat the entire seasoning process (applying oil, heating, and cooling) two to three more times. Each layer builds upon the last, creating a stronger, more non-stick surface. This might seem like a lot of work, but it’s the best way to ensure you know How to Season Cast Iron the Right Way.
The more layers you build, the better your pan will perform over time.

Maintaining Your Seasoned Cast Iron
Once your cast iron is seasoned, the real magic begins with regular use. Cooking with your cast iron is the best way to maintain and improve its seasoning. As you cook, especially with fats and oils, you’re adding new layers to the seasoning.
This continuous process makes your pan more non-stick and durable.
When it comes to cleaning, avoid harsh detergents and steel wool, especially on well-seasoned pans. For most messes, a stiff brush or a plastic scraper with hot water is enough. If you have stubborn bits stuck to the pan, you can use a little coarse salt as an abrasive with a paper towel.
Always rinse well and dry the pan immediately and thoroughly. You can even place it on a low heat on the stovetop for a minute or two to ensure all moisture evaporates.
After drying, apply a very thin coat of oil to the inside of the pan with a paper towel. This protects it from moisture and keeps the seasoning in good shape. Store your cast iron in a dry place.
If you notice the seasoning is wearing thin or food starts sticking more, it’s time to re-season. It’s a cycle of cooking, cleaning, and a little oiling that makes How to Season Cast Iron the Right Way a long-term commitment.
Common Mistakes to Avoid
Even when you know How to Season Cast Iron the Right Way, it’s easy to make small mistakes that can affect the outcome. Being aware of these common pitfalls can help you achieve a perfect seasoning every time.
- Using too much oil: This is probably the most common mistake. A thick layer of oil will become sticky and gummy instead of a hard, smooth surface. Always wipe off excess oil.
- Not drying thoroughly: Water is the enemy of cast iron. If you don’t dry your pan completely after washing, you’ll get rust spots, which can ruin your seasoning.
- Using the wrong oil: Some oils have low smoke points and can burn off too quickly or leave a sticky residue. Stick to oils like vegetable, canola, or grapeseed oil.
- Washing with harsh detergents: While a little mild soap is okay for initial cleaning or very tough messes, regular use of strong dish soap can strip away the seasoning.
- Not heating the oven high enough: The oven needs to be hot enough to polymerize the oil. If it’s not hot enough, the oil won’t bake on properly.
- Storing while wet: Never store your cast iron if it’s not completely dry. Moisture is the quickest way to invite rust.

Seasoning Different Types of Cast Iron
The basic principles of How to Season Cast Iron the Right Way apply to most cast iron cookware. However, there are some nuances depending on the type of pan you have.
New vs. Pre-Seasoned Cast Iron
Many new cast iron pans today come pre-seasoned. This means the manufacturer has already applied a base layer of seasoning. You can often start cooking with these pans right away.
However, it’s still a good idea to give them an extra seasoning or two before heavy use. This builds a stronger foundation and ensures better performance.
For a brand new, unseasoned pan, you’ll need to go through the full seasoning process from scratch. This is essential to create that protective, non-stick layer. Think of it as building the perfect foundation for a great cooking experience.
Vintage Cast Iron
Vintage cast iron pieces are often prized for their quality and durability. However, they may have accumulated rust or old, flaky seasoning over time. The process for restoring these pieces is similar to seasoning a rusty pan.
You’ll need to remove all rust and old seasoning, then proceed with the oven seasoning steps.
Restoring vintage cast iron can be very rewarding. A well-restored piece can be a workhorse in your kitchen for decades. Understanding How to Season Cast Iron the Right Way is key to bringing these old treasures back to life.
Enameled Cast Iron
It’s important to note that enameled cast iron, like Le Creuset or Staub, does not need to be seasoned. The enamel coating is already a non-stick, protective surface. In fact, trying to season enameled cast iron can damage the enamel.
Always follow the manufacturer’s specific cleaning and care instructions for enameled pieces.

How Often Should You Re-Season?
The good news is that you don’t need to re-season your cast iron constantly. If you’re using your pan regularly and cleaning it properly, the seasoning will build up and maintain itself. You’ll know it’s time to re-season when you start noticing food sticking more often, or if you see patches of rust appearing.
A good rule of thumb is to give your cast iron a touch-up seasoning every few months, especially if it’s not used very frequently. If you’ve had to scrub away a lot of stuck-on food or cleaned it with a bit more soap than usual, a quick re-seasoning can help restore that slick surface. This proactive approach is part of truly mastering How to Season Cast Iron the Right Way.

Comparison: Seasoning Methods
While the oven method is the most common and effective for initial seasoning, some people use other methods for maintenance or quick touch-ups. Understanding the differences can help you choose the best approach for your needs.
For anyone asking How to Season Cast Iron the Right Way for the first time, the oven method is highly recommended. It provides the most reliable and robust seasoning. Stovetop or grill methods are great for maintaining that seasoning over time.
Frequently Asked Questions
Question: Do I need to season a new cast iron skillet?
Answer: Most new cast iron skillets come pre-seasoned, but it’s still a good idea to add a few extra layers yourself. This builds a stronger, more durable non-stick surface from the start.
Question: What is the best oil to use for seasoning?
Answer: Oils with a high smoke point are best, such as vegetable oil, canola oil, grapeseed oil, or flaxseed oil. These create a hard, polymerized layer when heated.
Question: How do I know if my cast iron needs to be re-seasoned?
Answer: You’ll know it’s time to re-season if food starts sticking more than usual, if you see rust spots, or if the cooking surface looks dull and uneven.
Question: Can I use soap on my cast iron?
Answer: For routine cleaning, it’s best to avoid soap. If you must use soap, use a very mild one and rinse thoroughly. A stiff brush and hot water usually suffice.
Question: My cast iron looks sticky after seasoning. What went wrong?
Answer: This usually happens if too much oil was used. The oil didn’t fully polymerize and instead created a sticky residue. Try scrubbing it off and re-seasoning with a much thinner layer of oil.
Question: How do I season cast iron if I don’t have an oven?
Answer: You can season cast iron on a stovetop or on an outdoor grill. For stovetop, heat the pan and apply oil, repeating several times. Grill seasoning works similarly to oven seasoning but uses the grill’s heat.
Question: Is it okay to cook acidic foods like tomatoes in my cast iron?
Answer: It’s best to avoid cooking highly acidic foods like tomato sauce or lemon for long periods in a newly seasoned or poorly seasoned pan. This can strip the seasoning. Once your pan has a good, established seasoning, it can handle these foods better.
Final Thoughts
Learning How to Season Cast Iron the Right Way ensures your pans are non-stick, rust-free, and ready for any meal. Follow the simple steps of applying a thin oil layer and heating your pan to build a durable cooking surface. With regular use and proper care, your cast iron will become a beloved kitchen tool that lasts a lifetime.