Before You Replace Your Kettle, Check These 7 Things
At a Glance Before replacing your kettle, check seven common issues including the power supply connections, limescale buildup, and the automatic shut-off mechanism. Testing the wall outlet and cleanin…
Before replacing your kettle, check seven common issues including the power supply connections, limescale buildup, and the automatic shut-off mechanism. Testing the wall outlet and cleaning base contact points often resolves apparent failures, while descaling with vinegar or citric acid restores heating performance. These straightforward checks can save money and extend your kettle’s lifespan without needing a new purchase.
Albert Einstein once said, “In the middle of difficulty lies opportunity.” When my morning coffee is ruined by a broken appliance, I feel frustrated. But, I’ve learned that a broken device doesn’t always mean it’s time to replace it.

I’ve worked with kitchen tools for years. A broken unit can be really annoying. Before you replace your kettle, check these 7 things to see if a simple fix works. Many problems can be fixed at home without buying a new one.
This guide covers the most common issues I face. By following these steps, you can figure out if your appliance really needs to be replaced or just needs some care. Let’s save money and get that water boiling again.
Key Takeaways
- Identify common electrical faults that mimic total failure.
- Learn simple maintenance steps to extend appliance longevity.
- Understand when a repair is safer than a replacement.
- Save money by troubleshooting minor mechanical issues.
- Gain confidence in diagnosing household kitchen equipment.
Why Your Kettle Might Not Be Dead Yet
Many think a silent kettle is beyond repair. But, it’s rarely the case. Often, a small connection issue or mineral buildup stops the heating element.
Before giving up, always inspect your kettle. A simple kettle maintenance checklist can fix it in minutes. This saves money and keeps useful items from the landfill.

By troubleshooting, you might find the fix is easy. Issues like a loose base or limescale buildup are common. Here’s a quick guide to help you find the problem using a kettle maintenance checklist.
| Common Issue | Likely Cause | Quick Fix |
|---|---|---|
| Kettle won’t turn on | Loose power connection | Check base alignment |
| Slow boiling time | Limescale buildup | Descaling with vinegar |
| Leaking at the base | Worn seal or gasket | Tighten or replace seal |
| Auto-shutoff failure | Steam sensor blockage | Clean the sensor tube |
Taking these small steps can make your kettle last longer. Don’t replace it without checking these common issues. Your kettle might still have a lot of life left.
Before You Replace Your Kettle, Check These 7 Things
If your kettle stops heating, follow these seven steps before you replace your kettle, check these 7 things. I’ve made this order to help you find simple fixes or small problems fast. These steps are easy for anyone to do, no matter your repair skills.

Going through these steps helps figure out if it’s an electrical, mechanical, or cleaning issue. It’s really annoying when your morning coffee is ruined. But, a quick check often finds a simple fix. So, take your time to check these things before buying a new kettle.
Most problems come from wear or mineral buildup. If you’re thinking before you replace your kettle, check these 7 things, you might save a good machine. Here’s a quick guide for common issues I see.
| Common Issue | Likely Cause | Quick Fix |
|---|---|---|
| Kettle won’t turn on | Power connection | Check outlet and base |
| Slow heating | Limescale buildup | Descaling with vinegar |
| Leaking water | Loose seal | Tighten base screws |
| Lid won’t open | Debris obstruction | Clean hinge area |
Doing these checks can save you time and money. Always unplug the kettle before inspecting. If you follow this guide, your kettle might still have a lot of life left.
Inspecting the Power Supply and Base Connections
When my kettle won’t heat up, I first check the power source. It’s common to think the heating element is broken. But often, the real issue is a lack of electricity reaching the kettle.
Testing the wall outlet and power cord
I start by making sure the wall outlet has power. I plug in a small lamp to see if it works. If it does, I know the outlet is good and the problem is with the kettle.
Then, I look at the power cord for damage. I check for fraying, cuts, or kinks. If the cord is damaged, it’s a safety hazard and should not be used.

Cleaning the contact points on the base
If the cord and outlet are okay, I check the base and kettle connection. Dust, debris, or oxidation can build up over time. This buildup stops electricity from reaching the heating element.
To fix this, I follow these steps:
- Unplug the base from the wall outlet for complete safety.
- Use a dry, soft cloth to wipe the metal pins on the base.
- If there’s oxidation, I use rubbing alcohol on a cotton swab to clean it.
- Let the area dry completely before plugging it back in.
Keeping these contact points clean is key to any kettle troubleshooting guide. A clean connection ensures electricity flows properly every time.
Removing Limescale Buildup for Better Performance
If your kettle is slow to boil, it might have mineral buildup. Limescale is a big problem for electric kettles, especially in hard water areas. It makes the heating element work too hard.
This extra effort can cause the kettle to turn off early or use more energy. Learning how to extend kettle lifespan through regular care is a smart move. It saves money over time.

Identifying mineral deposits in the heating element
To spot buildup, I unplug and look inside the kettle’s base. If I see white flakes or a crusty layer on the coil, it needs a deep clean.
These deposits are common in areas with hard water. Ignoring them can make your tea or coffee taste metallic, which is not good.
Using vinegar or citric acid for a deep clean
I use a mix of white vinegar and water to clean these deposits. I fill the kettle with equal parts of each, then boil it and let it sit for thirty minutes.
If I don’t have vinegar, I mix a tablespoon of citric acid powder with water. After soaking, I rinse the kettle well to remove any acid. This method is the best way I’ve found to extend kettle lifespan and keep it working well.
Checking the Automatic Shut-off Mechanism
When my kettle won’t turn off, I check the automatic shut-off mechanism. This safety feature stops the kettle from boiling dry and causing damage. A good kettle troubleshooting guide helps me find out why it’s not working.

Why the switch fails to click off
The switch might not click off because the steam sensor can’t see the rising temperature. Often, mineral deposits or small debris block the steam path. When the sensor is blocked, it can’t trigger the power cut.
“Safety is not just a feature; it is the foundation of every reliable kitchen appliance.”
— Anonymous Home Maintenance Expert
Clearing debris from the steam sensor tube
To fix this, I check the small steam tube inside the kettle. If I see buildup, I use a soft brush or cotton swab to clean it. This is a key part of my kettle troubleshooting guide to keep the sensor working right.
After cleaning, the steam can reach the sensor again. I test the kettle with a little water to make sure it turns off right away. Keeping this area clean prevents future problems and keeps my appliance safe for years.
Addressing Leaks and Seal Degradation
A wet countertop doesn’t mean your kettle needs to be thrown away. Finding water under your appliance can be scary, but it’s often fixable. Taking a moment to investigate can save you from buying a new one.

Locating the source of the drip
First, I do a detailed check of the whole unit. I look closely at the base and the water level window. These spots are where leaks usually start.
It’s possible the water is just condensation dripping down. So, I dry the outside and put the kettle on a paper towel. Watching where the moisture shows up helps me find if it’s from the seal or a cracked window. Identifying the exact source is key to fixing it.
When a simple tightening fixes the problem
After finding the leak’s source, I often find the fix is easy. Many leaks come from loose screws or a gasket that’s lost its grip. I’ve fixed many kettles by just tightening the screws.
With simple tools, I tighten screws around the base or handle. If the seal looks worn but still good, sometimes just adjusting it stops the leak. Always be careful not to overtighten, as it can harm the kettle’s plastic or internal parts.
Evaluating the Heating Element Efficiency
When your morning coffee takes too long, it’s time to check your kettle. Many think it’s broken when it just needs some care. Spotting signs of a faulty kettle early can help you choose to fix or replace it.

Signs of a failing heating coil
The heating element is your kettle’s engine. When it starts to falter, it sends out clear signals. If you see these red flags, your coil might be close to needing a replacement:
- Unusual grinding or buzzing noises during the heating cycle.
- A distinct burning smell from the base or element.
- Visible corrosion, pitting, or damage on the heating surface.
- The kettle turns off too soon before the water boils.
Understanding the difference between slow heating and total failure
It’s key to tell if your kettle is just slow or if it’s broken. A slow kettle might just have too much limescale, not a mechanical issue. If it looks clean but still takes ages, a deep clean might fix it.
But if your kettle shows clear signs of a faulty kettle, like discoloration or exposed wiring, it’s time to replace it. Use the table below to check your kettle’s condition:
| Symptom | Likely Cause | Recommended Action |
|---|---|---|
| Slow boiling | Limescale buildup | Perform a deep clean |
| Burning odor | Element failure | Stop use immediately |
| No heat at all | Broken circuit | Check connections or replace |
If your kettle is clean but still won’t heat well, its parts have worn out. Always put safety first with electrical heating elements. If you see obvious damage, don’t risk using it further.
Troubleshooting Lid and Spout Obstructions
It’s surprising how often a stuck lid or clogged spout can cause a kettle to malfunction. Many people think they need a new kettle when a simple clean or adjustment will fix it. Maintaining proper airflow is key for your kettle to work right.
How a stuck lid affects pressure sensors
The lid of your kettle is more than just a cover. It’s crucial for the pressure system. If it doesn’t close well, steam escapes too soon. This stops the pressure from building up right, messing with the automatic shut-off sensor.
Always check the latch for debris and the seal for damage. If the lid is loose or doesn’t click, the sensor won’t turn off. This can waste energy and be unsafe.
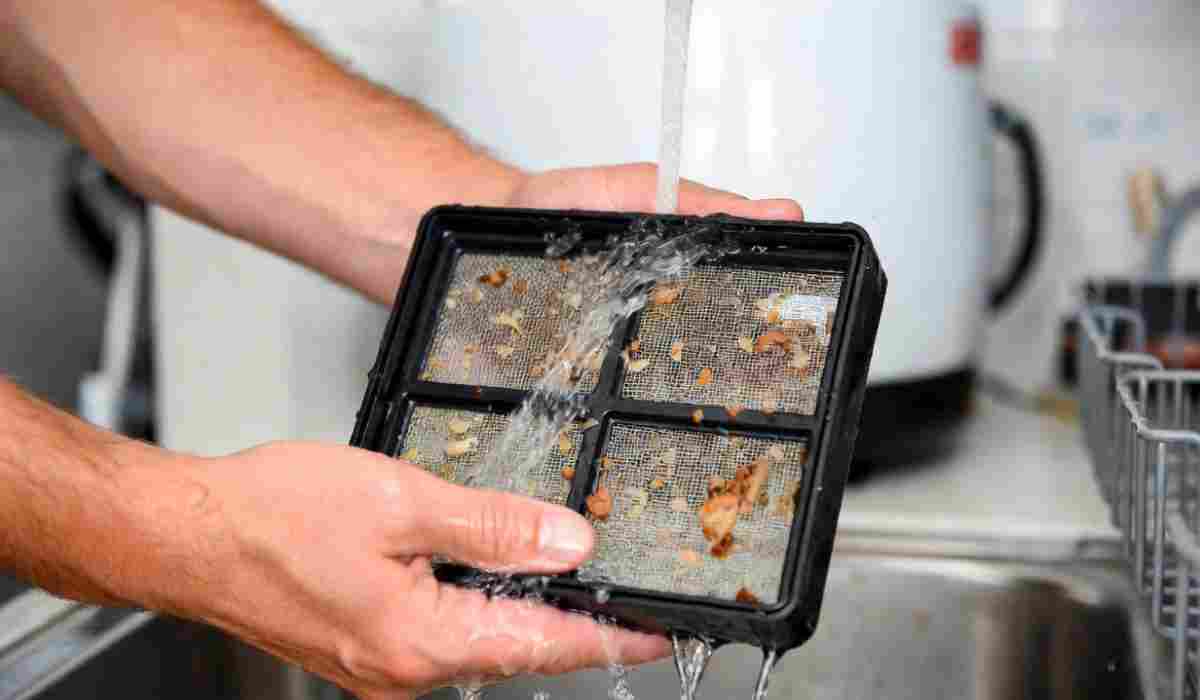
Clearing the spout filter to improve flow
I also check the spout filter often. Mineral buildup and limescale can block water flow. This makes the heating element work harder, leading to overheating issues.
Take out the filter and clean it well. If it’s damaged or clogged, replace it. This keeps your kettle working well and your tea hot fast.
| Issue | Potential Cause | Recommended Action |
|---|---|---|
| Lid won’t close | Debris in latch | Clean latch area |
| Slow water flow | Clogged mesh filter | Soak in vinegar |
| Sensor failure | Steam leakage | Check lid seal |
| Overheating | Restricted spout | Clear mineral buildup |
When It Is Truly Time to Buy a New Kettle
I’ve learned that knowing when to replace a kettle is crucial for any home cook. Sometimes, even I, who loves fixing things, must accept that some appliances are beyond repair. Safety should always be my top priority when it comes to kitchen electronics.
Recognizing irreparable electrical faults
If I see signs of internal failure, I stop using the device right away. Visible sparks or a burning smell during use are clear warnings. These signs mean the appliance’s internal parts are damaged beyond repair.
An appliance acting strangely often means it’s failing. This could be a bad circuit board or a melted heating element. Using it can be dangerous and might even cause a fire. In such cases, deciding when to replace a kettle is easy to do to keep my home safe.
Safety concerns regarding frayed wiring
Exposed wiring or a damaged plug are clear signs a kettle needs to be replaced. Electrical shocks are a serious risk I’m not willing to take, even to save money.
If a cord can’t be safely fixed by a pro, it’s time to get rid of the kettle. I always put my family’s safety first, even if it means getting a new appliance. Knowing when to replace a kettle helps me keep my kitchen safe and working well.
| Issue Type | Repairable | Replacement Needed |
|---|---|---|
| Limescale buildup | Yes | No |
| Loose base connection | Yes | No |
| Burning smell | No | Yes |
| Frayed power cord | No | Yes |
Choosing a Reliable Replacement Model
When I decide it’s time for a new kettle, I look for one that’s durability and has the features I need. Finding the right one can be hard, but with a few kettle replacement tips, it’s easier. I always choose quality over price to make sure it lasts for years.
Features to look for in modern electric kettles
I search for kettles with important safety features like boil-dry protection and auto-shutoff. These features give me peace of mind in the morning. I also look for ones that boil water fast but don’t use too much energy.
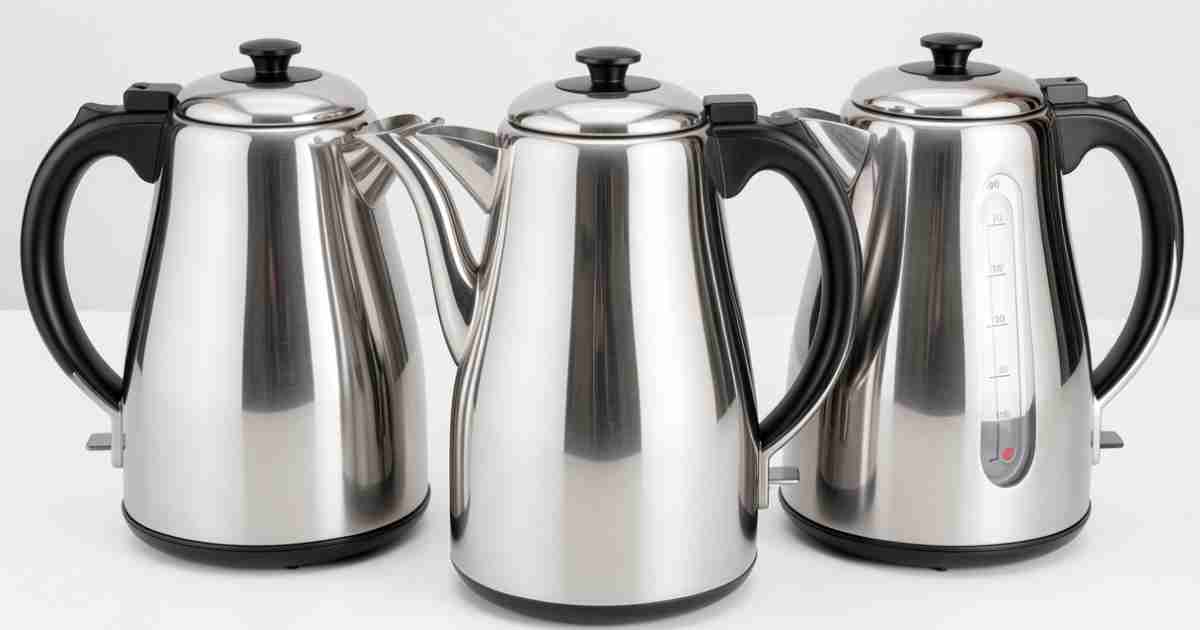
Comparing stainless steel versus glass durability
When comparing materials, I focus on how long the kettle will last. Stainless steel usually lasts longer than glass, which can break easily. Glass kettles are pretty but need more care.
These kettle replacement tips help me pick a reliable kettle for my kitchen. By considering the pros and cons of each material, I find the perfect fit for my lifestyle.
| Material Type | Durability | Maintenance | Visual Appeal |
|---|---|---|---|
| Stainless Steel | High | Easy | Industrial |
| Borosilicate Glass | Moderate | Moderate | Modern |
| Plastic (BPA-Free) | Low | Easy | Basic |
Conclusion
Fixing your kitchen appliances doesn’t have to be hard. I hope this guide makes you feel ready to tackle these simple fixes yourself.
Just check the power, clean the heating element, and look at the safety sensors. This can really help your appliance last longer. Brands like Breville or Cuisinart make these tasks easy for most people.
Your safety is the most important thing when working with electrical items. If you see frayed wires or keep getting electrical problems, it’s safer to recycle the item. Keeping your kitchen in good shape helps it run better and saves resources.
I hope these tips help you fix your kettle. Now, you can enjoy your favorite hot drinks without spending a lot on a new one. Share your repair stories or ask questions about certain models if you need to.
FAQ
What should I do first if my kettle refuses to turn on?
First, test your wall outlet with another appliance, like a Cuisinart toaster. This checks if the outlet is working. Also, look at the power cord for damage. Sometimes, cleaning the contact points with a dry cloth fixes the issue.
Why is my kettle taking so much longer to boil than it used to?
The main reason is often limescale buildup on the heating element. This acts as insulation, making the kettle work harder. Cleaning it monthly with Heinz White Vinegar or Arm & Hammer citric acid helps a lot.
My kettle keeps boiling and won’t shut off automatically; is it broken?
Not always! Check if the lid is closed tightly and the spout filter is clear. Also, inspect the steam sensor tube for debris. These simple checks can solve the problem before you think of replacing your kettle.
I see water pooling under the base. Does this mean I have a leak?
Water pooling might just be from overfilling or condensation. But, if it’s a leak, check the water level window and seals. A loose screw can also cause leaks. Cracks in the plastic casing mean it’s time for a new kettle.
How do I know when it is truly time to replace a kettle rather than fixing it?
If you smell burning, see sparks, or frayed wiring, stop using it. Severe corrosion or intermittent electrical faults also mean it’s time for a new one. Safety always comes first.
What should I look for if I decide to buy a new model?
Look for a stainless steel interior when buying a new kettle. Brands like Breville or Fellow are good choices. They offer boil-dry protection and durable heating elements.